How To Remove Red Eyes With GIMP
Posted: February 23rd, 2021 ˑ Filled under:
GIMP Tips Removing red eyes from photos with Gimp is a straight forward process. It involves just five steps and allows for a fair amount of flexibility for the photographer. Let’s jump right in!

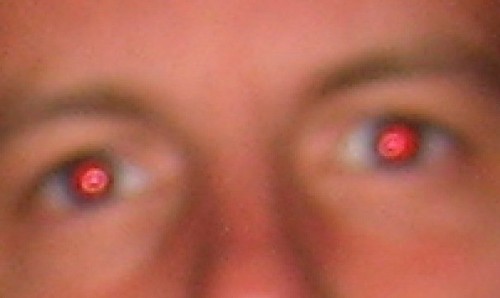
That’s me. Slightly out of focus as usual. This shot was taken with a simple point and shoot in near darkness. And with plenty of red to remove. The trick is to not simply replace the red with another color or the result will be too fake.
1) Zoom, zoom, zoom way in (hitting the “+” key) until just the eyes fill the screen like so:
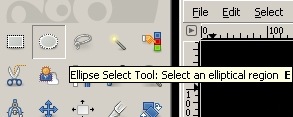
2) Click on the Ellipse Select Tool in the Toolbox. Be sure to select “Feather edges” giving them a radius around 15-20.
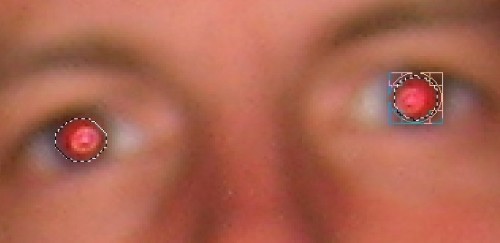
3) Now draw an ellipse around one eye that encompasses the redness to be removed. Hold down “Shift” and draw an ellipse around the other eye. The corners of the ellipses can be click and dragged to adjust sizes as needed.
4) From the Menu Bar select “Filters -> Enhance -> Red Eye Removal”. A dialog box like this will appear.
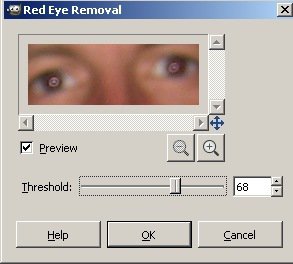
5) Select the amount of removal to suit your desires and then click “OK”

Presto! You’re finished! The tool works to varying degrees depending on the amount of redness but when a tight selection is made around the eyes, the results are very pleasing while not seeming too fake. I chose a slightly blurry photo as they are the hardest from which to remove redeye. A crisper picture will produce better results as there will be more contrast between the red and all other colors.
While there are many different ways to select the area for redeye removal, I chose the Ellipse over the Fuzzy Select Tool as I found the Fuzzy Select tool to be more cumbersome when the redeyes have multiple shades of red. Some people also suggest selecting a larger space with the Rectangle Select Tool, however this did not work for me as my skin tone was too close to the redeye color and gave poor results. Feel free to try another selection method and find what works best for you.


.gif)


