How to bypass the Portrait Mode on Your Digital Camera and Get Great Portrait

Unless you have a high end DSLR, most digital cameras these days come with an array of shooting modes (including portrait mode) for a photographer to choose from when out using their camera. These shooting modes are designed to help camera owners to quickly tell their camera what type of shot they are taking to give the camera a hint at what type of effect you want.
The results that your digital camera will give you in these modes is often quite good – however they do take the chance to be a little creative with your photography away and if you’re someone wanting to improve your photography you’re less likely to learn how to use your camera effectively by sticking to them.
So how do you set up your camera to get great Portrait shots without having to use Portrait Mode?
As with almost all questions that we explore here at Digital Photography School – this one will have a variety of answers depending upon your photographic style, the camera that you’re using and the type of portraits that you’re hoping to achieve – however let me share a few starting points that will hopefully give you some good results so that you can then start experimenting (note: it might be helpful to have read my previous post on Exposure if you’re a beginner – hopefully this will help you get some of the concepts I’m explaining below a little quicker).
Switch to Aperture Priority Mode

Choose a Large Aperture for Nice Blurry Backgrounds
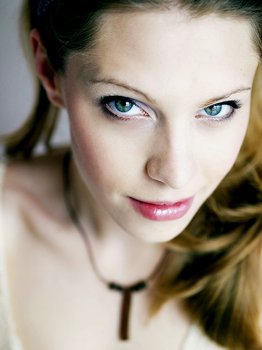
The actual aperture setting that you choose when in Aperture Priority Mode will vary from situation to situation and between camera/lens setups – but in most cases you’ll probably want to start with a fairly large aperture as this will decrease the depth of field in your shots (this is what portrait mode generally does). This will help to ensure you have a nice blurry background. The beauty of this type of setting is that it leaves your subject as the only element in focus – highlighting them as the main focal point and removing any other distracting elements (read more on using aperture to get blurry background).
Keep in mind that if you have a very fast lens that choosing the maximum aperture available can decrease the depth of field to a point where some parts of the face of your subject are in focus while others are not. Also the very maximum aperture might mean you are not shooting in your lenses sweet spot. Pull it back a stop or two and you might get a slightly sharper image – the key is to do some experimenting if you have the time to do so.
Select a Low ISO for Smooth Shots
The ISO setting that you use will vary depending upon the lighting situation that you’re faced with – but in most cases you’ll want to decrease the amount of grain or noise in your shot by selecting a low ISO (I try to stick to the 100-200 range). The main thing to watch when selecting an ISO setting is what impact it has on your shutter speed. Sometimes choosing a very low ISO will mean your shutter speed is just too slow for sharp images (I’ll talk about this below). If the shutter speed is too slow at the ISO you’ve selected you’ll either need a larger Aperture or a higher ISO.
Shutter Speed

White Balance
The white balance that you will need to select when taking portraits will again vary upon the lighting conditions that you’re shooting in. Learn more about White Balance.
Focussing Mode
Many digital cameras allow the photographer to choose between a number of focusing modes. At one end of the spectrum the ‘Auto Focussing’ setting on most cameras will use multiple focussing points to determine where to focus. At the other end of things is a manual focussing mode where the photographer has complete control. In the middle is often the option to focus the camera on a single point in the frame.
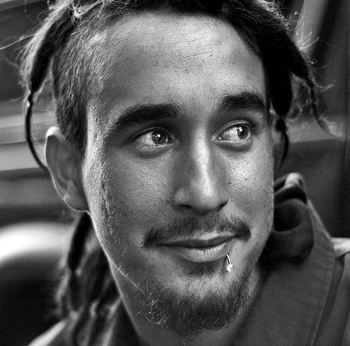
While the multi point AF setting will generally get things pretty right in most normal shooting conditions, in some situations it is helpful to be able to use either manual focusing or the single focussing point options (particularly in lower light). I personally prefer the single point setting as it allows me to pinpoint the exact part of the face that I want in focus (almost always the eyes).
Metering Modes
In a similar way, many cameras allow a number of different metering modes. Once again, on many cameras this ranges from a multi point system where the whole frame is taken into consideration when working out exposure levels through to a single point metering system (spot metering) where the photographer can pin point one small part of the image that they want the exposure to be base upon. Again, I often choose a spot metering mode when shooting portraits – particularly when the subject is backlit or where there are bright or dark parts of the image that could skew the results.


.gif)


