How to Add Film Grain
With mainstream days of film long gone, one would expect all the disadvantages it had on offer to be rid of for all times, as well. Digital is all about clean, high quality images now. Contrary to such an assumption, however, film has not left our everyday lives without a trace. A trace that is even more noticeable now that photographers got used to the differences between the two “religions”. Now, I say “got used to”, but the truth is plenty of photographers got bored of the sterile digital look and thus would seek ways of livening it up (instagramed anything lately?). One notable featured of photographic film has always been grain. Although, like high ISO noise in digital world, it was a result of increased light sensitivity and as such, an undesirable degradation of image quality, film grain was loved even during the past era of photography. Reasons behind it would make a fine discussion – in short I would say that grain was simply organic and beautiful – but one to be had with a pint of beer in hand and complimented by laughter and warm fire light. Instead, we will concentrate on actually applying film grain, or what is closest to it, with digital photographs. In this Mastering Lightroom series article, I will explain how to add film grain to your images. You will learn how to increase the size of grain, make it rougher or smoother and also hide high ISO noise (or make it more appealing) with it without the need of applying noise reduction.
In essence, it is the chemical equivalent of digital high ISO noise, or, rather, the other way around. As film sensitivity went up, the amount and character of grain increased, just as ISO noise levels increase as you push sensor sensitivity to light up. Noticeably, film grain became visible at much lower sensitivities than current digital noise. Certain film of 400 ASA/ISO would already show visible graininess, and producing fine-grain film of 400 value was no small feat. Understandably, there weren’t any ISO 12800 equivalent films. One of the most sensitive films, the wonderful B&W Ilford Delta 3200, rendered so much grain, it would be thought quite unusable by some all-modern, technical quality junkies of digital era who have never been familiar with film aesthetics. Some prefer to see Delta 3200 as 1600 film pushed one stop during development. Think underexposing an image and correcting exposure by one stop in Lightroom with Exposure slider.
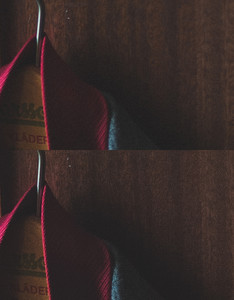
Here is a close-up of a hastily scanned Shanghai GP3 negative film showing grain. It’s not nearly the same as looking at an enlarged photograph and lacks dynamic range of such as well, but see if you notice any difference between grain and regular digital noise.

2) How is it Different from High ISO Noise?
To put it simply for our purposes and not dive in too deep in film versus digital discussion, film grain is beautiful, high ISO noise is not. That is not to say all cameras produce ugly noise at higher sensitivities – it can be somewhat more appealing with some cameras and less with other. For example, most Nikon DSLRs are thought to render somewhat grain-like noise, one that looks less artificial than that of other manufacturers (on most occasions, I tend to agree). But such differences usually arise when comparing something that’s not exactly nice to look at to something that’s even less pleasant. So, some cameras produce noise that is less ugly than others, but is still not particularly flattering. Film grain is, on the contrary, often used to enhance an image, strengthen the feeling and emotion captured, make it more organic in many senses of the word. Photographers found many ways of changing how film grain looks during their time in darkrooms by using certain chemicals and different kinds of light, and would often choose film based on grain for different occasions. In many ways, it was as important as a favorite lens.
3) Adding and Adjusting Film Grain within Lightroom 4
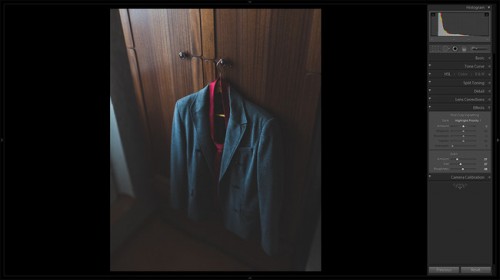
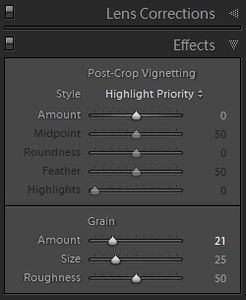
Working with film grain is a very straightforward process and involves just three sliders in the Effects tab.
3.1) Where do I Find It?
3.2) Adjusting Grain Amount
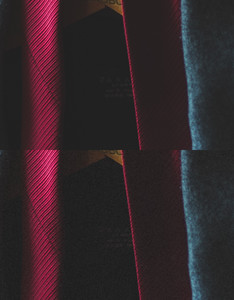
The Amount slider can be set between values of 0 to 100. The default setting is 0, and results in no grain added by Lightroom. Change the value to 1, and a barely noticeable pattern will be added. You will need to look very closely even if you set the other two sliders to extreme values. There’s a chance one will fail to notice anything change with such a small Amount set. Move the Amount slider to 100, though, and the situation is quite different – you will end up with a very grainy image. Usually, I find value of around 20 to work rather well, so you may use that as your starting point. Remember, it’s not just the Amount slider that matters. Don’t be surprised if you find yourself readjusting these settings more than once or twice before you’re satisfied, as each setting will change the way grain looks and affects your image very noticeably.
3.3) Grain Size
Do you want it big, or would you prefer to keep more detail and leave it small? Size value will depend on image resolution, but even more so on tones and the content of a photograph in question. I often change the size of grain and it may vary through almost all the scale, with values between 20 and 80 selected most often. Larger grain, at least for me, works better with B&W images. My final decision is usually made while looking at the full-sized photograph, not zoomed in to 100%. I don’t want to pixel peep. I want to see how it affects the whole picture. As a matter of fact, that is how I check all the Grain settings within Effects tab.
3.4) Grain Roughness Adjustment
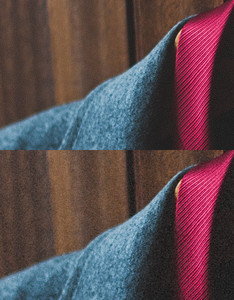
4) Will it Make My Photographs Better?
In short, no. Grain – or lack of it – is just part of the photograph. It either helps create the mood, or deteriorates it. You either like it, or you don’t, and neither choice will make you better or worse for it. It is a matter of taste. If you feel adding film grain, and especially artificially created by clever software, is just a silly way of degrading technical image quality, don’t bother with it. Me, I prefer my images less sterile and livelier, and thus often add a little grain, a sort of texture to overly smooth tones. If that’s something you would rather not do, if you enjoy perfectionistic approach to quality digital embodies, there’s no need to play with Film Grain settings.



.gif)


